Posts

Showing posts from 2013

Upcycling Books

Image
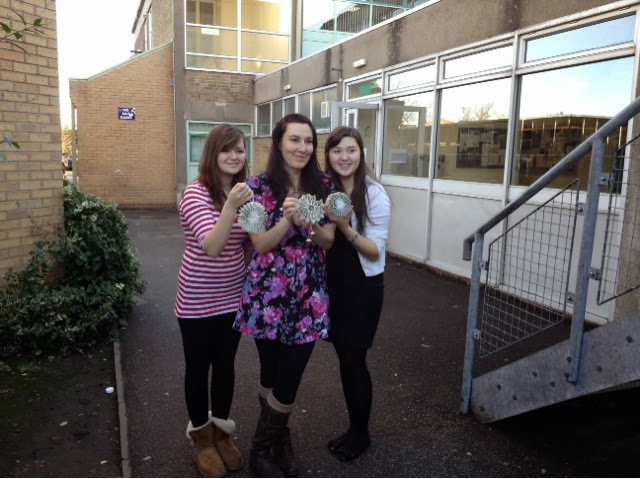
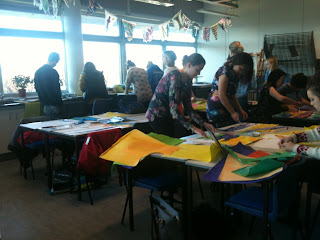
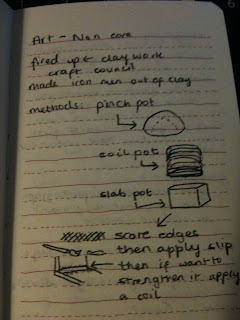
A brilliant idea which I intend to use next time I'm in school around Christmas time is upcycling books. This is when you use old and battered books (but if you do decide to use this idea with children then ensure that you say that these books are broken so they don't go home and start tearing up new books!) and reinvent them, using the books and giving them a new purpose. There is an amazing artist called Bronia Sawyer who is from the midlands area and has gone into local schools to show children how to upcycle books. She's been experimenting with folding and utilising paper to create sculptural pieces of artwork and even wearable pieces, with a focus on Upcycling books. Her website is www.littlebookbird.co.uk and showcases her inspiring artwork, have a mooch :)  This is a photo of me, Bronia, and Ella (my sister)  Here are some examples I've made from upcycling books...

Reflecting on my summer placement...

Image
Okay, so I know that this is a bit of a late reflection but since we split up from uni I have been off holidaying and visiting family out in Turkey, so haven't really had a chance to reflect properly on here yet :) I had my placement at an amazing school which was in a federation...  And to be honest I didn't know what a federation was until this placement! It is where two or more schools are linked together with the same executive head teacher, they then have the same set up as any other school; so a head teacher, deputy heads etc. But what makes these schools special is that they do the same topics at the same time so you should be able to look at two year 4 children's books and find that they have done the same work that week; even though they're in different schools and classes. The classroom! I had an amazing experience at the school, and enjoyed being in year 4 which surprised me as I've only been in with lower KS1/ EYFS really before so this was

Glassy Things!

Image
As a hobby I do Enamelling which is melting glass powder onto a metal to create pattern or effects, and at the most recent fair with the Guild of Enamellers we exhibited at the NEC Hobbycraft, Fashion and Stitch show. The Guild of Enamellers website can be found here:  http://www.guildofenamellers.org/  and they welcome beginners happily. At this show I met an amazing lampworker [I will explain what this means later :) ] called Ray Skene who's website is:  http://www.celticglass.co.uk/sculptural.html , who I watched for hours as he melted and manipulated glass rods into loads of different shapes. He then allowed me to try making a glass bead which I was so excited about as it looked like it was such fun and a brilliant skill to learn. After making my first bead I was hooked and Ray told me about the Flame Off event which happens once a year and is an amazing glass event where you can go along and try your hand over the two days at lampwork. I have mentioned lampwork a couple of

Felting

Image
Felting is a simple and effective way of allowing children to explore textiles through a craft, wet felting lends itself well to the classroom environment as it is easy enough to set up and each child will be able to do this technique.If you want details of how to wet felt there are loads of tutorials on you tube or even google wet felting and you will find a wide range of sites and blogs to help you. Here are some photos of my felting work.

Final Etching

Image
Here are some photos of my final etching :)

Etching

Image
In our seminars we also looked at printing, specifically at etching. We used an intaglio/dry point technique and then printed using printing inks and put them through a roller press. To do this you had to take a piece of perspex and a sharp object such as the end of a nail and scratch you design onto the perspex. You have to also remember that your design will be the opposite to how you are drawing it when you print so you have to take care with lettering that you etch it on the wrong way round onto your perspex to have it print the right way round. This photo show the perspex and scratching tool. After you have etched the design you want you the apply a small blob of printing ink onto your printing plate (the perspex). To make this easier we used a toothbrush to spread the ink evenly and get it into the scratches you made on the perspex. You then remove the excess ink from your plate using newspaper and cloth, this should mean you can see the lines you have etched in

Printing

Image
Double Elephant Print states that ‘Artists are drawn to printmaking because it can provide a language of marks, a richness of colour and depth and other unique characteristics that can’t be achieved in any other way.’ I think that this statement is true as each print is a unique piece of artwork in itself and will not be recreated/copied exactly twice. It also means that children can really explore mark-making and line as the lines when printing are clear and defined. During saturation week I lead four press printing lessons and from that was able to observe the children’s thought and discussion processes when carrying out these prints. We used polyboard and printed our tessellations meaning we had a cross curricular link with Maths meeting ‘Reasoning: K - search for pattern in their results; develop logical thinking and explain their reasoning’ and Art ‘4b - materials and processes used in art, craft and design and how these can be matched to ideas and intentions’ from the

Collage

Image
‘Collage appeals to children because it is essentially about transformation: torn strips of paper could become an autumn landscape, while Frankenstein’s monster might emerge from the contents of a rubbish bin.’ (Cole, S. et al)  This quote sums up the appeal of collage to me, that children can use anything from recycled materials to painted tissue paper created deliberately for the purpose of collaging with. To create our own collages we inked tissue paper to create the desired colours needed and then continued to tear the paper to create desired shapes. Another appeal of collage is that it is an inclusive technique and you do not need to be the best at drawing or painting. Therefore it may give children within your class the freedom to experiment with shape, texture and colour without the need to make their picture look ‘right’. Being an inclusive side of art this may mean that it would be suited to not only younger children who will be learning through play and experimentat

Pictorial Poster

Image
After having been a task to design a pictorial poster to advertise coming to visit Plymouth we began by asking ourselves what a poster is in one word, and came up with answers such as visual, concise, propaganda and informative. Other definitions that came up were any piece of printed paper designed to be attached to wall or vertical surface and uses text and graphics – sometimes just one or the other. We then looked at the purpose of a poster and came up with answers such as to convey meaning, instructional, to request, to protest and for advertising purposes. When researching what components make a poster I found that Aristoff stated ‘A less-is-more principle remains a reasonable assumption: the fewer informative elements used, the more appealing and effective the poster’. This is regarding the composition and visual elements in particular and means that to create an effective poster you do not need to overcrowd it; just one significant image is enough with a catchy slogan or

Clay Robots!

Image
Once we had covered all of the different joining techniques we then went on to create Iron Men (although mine looks more like a robot...) This was putting the skills which we had learnt into practice and personally I used all three of the techniques as I wanted to test them out to see how they ended up looking in practice. We also discussed the use of tools such as knives in schools as our technician Tony asked us if we were to teach a clay lesson in a primary school would we allow our class to use knives, instinctively I answered no due to the health and safety of having a set of knives in the classroom but Tony made a really good point that if you do not allow the children to work with proper tools then you are limiting their experience with Art as the plastic tools that had sharp pointy ends were just as dangerous if used to poke or stab someone else. This really made me think about allowing the children to work with knives as before I would have said automatically no but after

Clay Work...

Image
In our foundation art session this week we did clay work with the art technician which I found really useful. This is because I have not done much ceramic work in art other than back in secondary school when we made coil pots and painted them, but I really enjoyed this session as it felt like we were achieving something and actually had made an object that we could take away and keep. I think that many schools shy away from using clay as it is messy and the teachers if they are non specialists may not have had much experience in working with the material themselves, but it is such a useful and hands on method of creating a thing that the children can take away and keep that we shouldn't deny children in primary schools of this experience. In this session we covered three different techniques of creating pots which were creating: Pinch Pots  Which is where you start with a ball of clay and stick your thumb in the middle and pinch around the outside to create your pot so p

Final Illustration

Image
Here are some photos of my final Illustration.